
AI
Automation
Build a ChatGPT bot for Whatsapp

Sahil
•
Jan 17, 2022
ChatGPT has taken the tech world by storm and for good reason! It's impressive and the conversations feel natural. Let's connect it to the most popular messaging app in the world.
If you haven't heard of ChatGPT, you must be off the grid. Respect. Most feeds and timelines are flooded with pics of conversations from this AI that seemingly is the most intelligent "thing" in the world. People have been using it for everything from answering questions to just having a casual chat. It's definitely unique and innovative, and I believe it has the potential to change how we fundamentally think about AI.
Since its release, it's been used by millions of people around the world and most are shocked by its ability to hold a conversation just like a real person. The prospect of being able to chat with an AI that can understand and respond to us in a natural way is really exciting.
If you have yet to try it, what are you waiting for? Go through some of these other notes that do an introductory breakdown and take a stab yourself:


In this note, we'll build a bot that gives you the ability to chat with ChatGPT directly from Whatsapp!
We'll be using the ChatSonic API to build this. If you're not familiar with ChatSonic, it's like ChatGPT, but with superpowers! It's powerful and incredibly conversational for text and image creation, and it's definitely worth checking out if you want to level up your content creation game
One of the key benefits of using ChatSonic is that it can connect to the internet, allowing it to access a wealth of information and resources. This makes it even more powerful than ChatGPT, as it can provide more accurate and up-to-date responses to user queries.
Let's get started!
Step 1: Setting up Twilio account
If you have ever built WhatsApp bots before, you must have heard of Twilio. Twilio is a cloud communications platform that allows you to build WhatsApp bots easily. With Twilio, you can create automated chatbots that can send and receive messages from your customers on WhatsApp.
You can use Twilio to build a wide range of WhatsApp bots, such as customer service chatbots, e-commerce chatbots, and more.
Setting up a WhatsApp bot with Twilio is super simple and straightforward.

The first step is to sign up for a Twilio account. You can sign up for a free trial account to get started.
After creating and verifying your account, log into your account and click on "Console" tab on the navbar. Here, take note of your ACCOUNT SID and AUTH TOKEN.

Finally, to set up your WhatsApp sandbox environment, click here. This will take you to the appropriate page where you can complete the setup process.

Connect to your sandbox by sending a WhatsApp message to the Twilio number on the page.
PS. Your join code will be different than mine.

Great! We’ve set up Twilio for our chatbot. Believe it or not, this was the most difficult part of this entire note. 😆
Moving on…
Step 2: Setting up ChatSonic account
Visit app.writesonic.com and create an account/log in. Once you're in, hover your cursor over the display picture in the top-right corner to open the profile menu.

To access your API dashboard, click on the "API Dashboard" button. This will navigate you to the page containing your API dashboard. In this dashboard, click on the switch to activate the API.

Once the API has been activated, click on the “Reveal API Key” button and note down your API key.
This API key will be used to interact with the ChatSonic API. To explore how the API works, head over to the documentation of the API via this link.

You can also test the API by pasting your API key in the Header and clicking on the “Try it!” button.

Now we’re all set to write the code for our chatbot.
So without wasting any more time, let’s get down to business.
Step 3: Building the webhook
We'll be using Replit to deploy our webhook. Replit is a really cool platform that allows you to build, run, and share code in a variety of programming languages. It's super easy to use and you can get started with just a few clicks.
If you don't already have a Replit account, I'd recommend creating one. It's free and only takes a few minutes to set up. Go here to create an account/login.
I've set up an environment for us to use on Replit to skip the setup process.
Just head on over here and give it a couple of seconds to fork. Easy peasy!
The server.js file contains all the code for our chatbot.

Let me break this code down and explain the important parts in a way that's a bit easier to understand.

So first off, we're pulling in some libraries at the top of the code that we'll be using later on. These libraries give us some tools to build out our webhook and do stuff like send and receive text messages, make API requests, and more.

Next, we see some variables being defined with const. These are just strings or objects that we'll be using later on in the code.
Copy and paste the accountSid and authToken from your Twilio console.
Similarly, enter your ChatSonic API key on line number 11.

Next, we see an app.post() route being defined. This route will be run whenever we get a POST request at the /incoming endpoint.
Inside the route handler, we see a bunch of stuff happening. First, we create a new MessagingResponse object, which is just an object that we can use to build a response to send back to the client. Then, we see an async function being defined, which makes a request to the ChatSonic API using the sdk object that we defined earlier. The function is passed some options and some additional options specifying the "engine" to use.
You can set the enable_google_results option as true if you want your chatbot to include google results in its answers.
The enable_memory option can be set to true or false depending on whether you want the chatbot to remember the conversations or not.
Finally, we see the twiml.message() function being called with the response from the ChatSonic API, and the response being sent back to the client.
Step 4: Deploying the webhook
Click on the run button or type node server.js in your console to run the webhook.
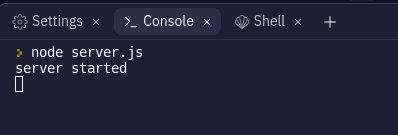
LFG! If you’re getting the same message as mine, it means you’ve successfully deployed the webhook.
Step 5: Configuring the webhook on Twilio
Copy the URL of your of your webhook from Replit.

Let's return to the WhatsApp Sandbox and input a webhook URL for receiving messages.

Don’t forget to add /incoming at the end of the URL which is the route of our webhook that we had defined earlier.
Finally, click on the “Save” button at the bottom of the page to save our config.
Our chatbot is finally ready to use. Let’s test it out! 🥳


You've made it!
And just like that, you've just built your own personal ChatGPT with the ChatSonic API in less than 10 minutes! The best part is you can now access it directly through WhatsApp without opening a browser and visiting a website. Just send it a WhatsApp message, and it will use its natural language processing abilities to generate a response. You can even train it on specific topics or conversational styles to make it more tailored to your preferences.
Personally, I had a lot of fun building this chatbot. It is indeed a rewarding build that is sure to teach you a lot, whether you're a seasoned developer or a complete beginner.
Till next ship,
Sahil
PS. wanna create some sick AI avatars?!
Wanna build your own AI Avatar using 5 photos of yourself? Check out this project. All it takes is a weekend to take your skills to a whole new level.

Join the the world's best builders for a 6-week sprint
Come join the best builders from around the world to build wild ideas in web3, ML/AI, gaming, bio-anything. You've got what it takes - all you need to do is apply